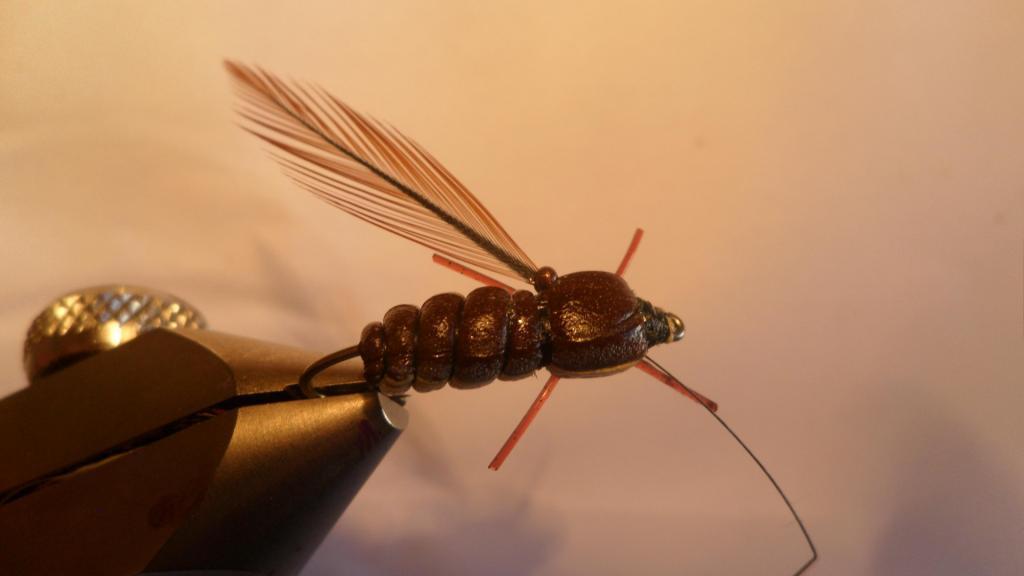
Tying the Flying Ant (Termite)
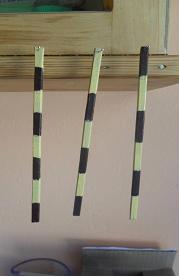
1. Paint a 4-5mm bevelled strip of foam alternately in cream and dark brown segments each 25mm long. Dry properly and dip in Seal Skin. Repeat the Seal Skin an hour or so before tying.
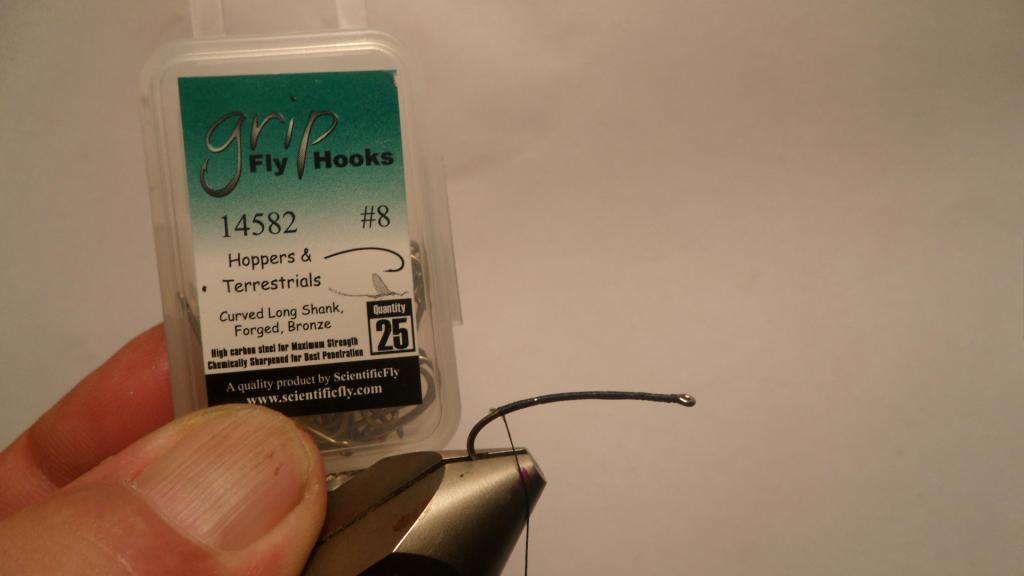
2. Prepare a no.8 Grip 14582 or similar hook as normal and leave silk at the bend of the hook
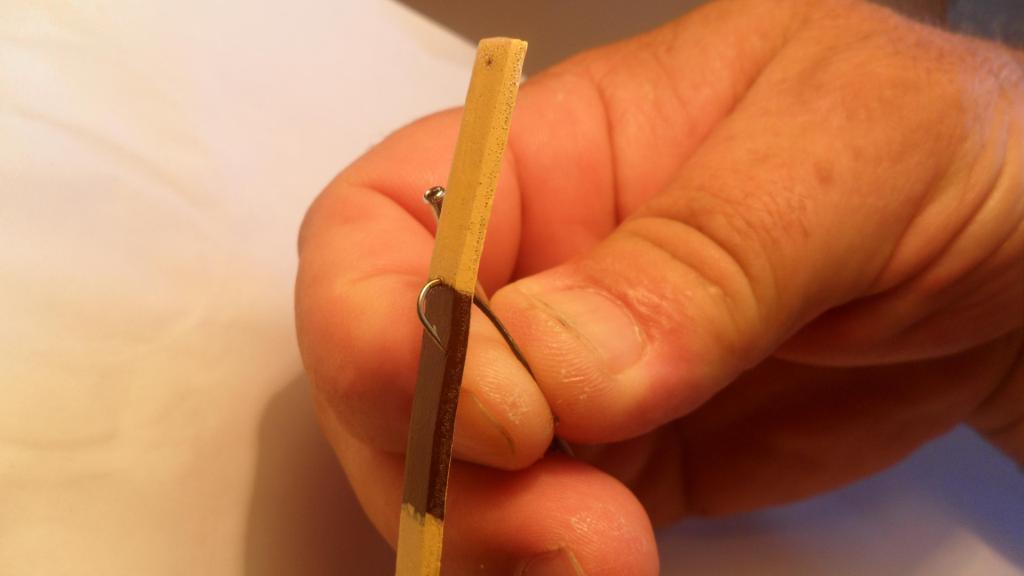
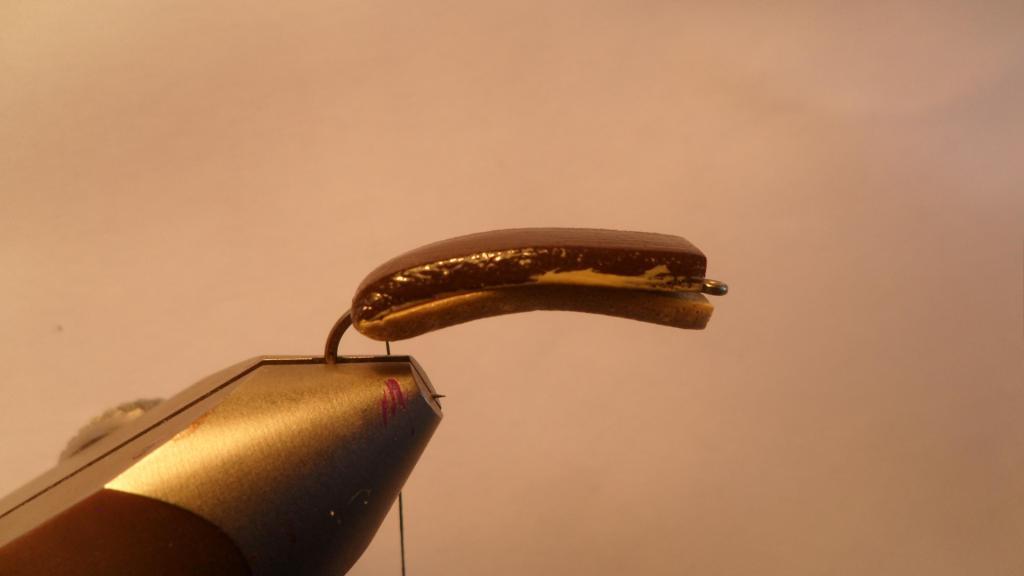
3. Pierce the foam with your hook exactly where the two colours join. The cream segment will form the belly and the darker segment the back of the fly.
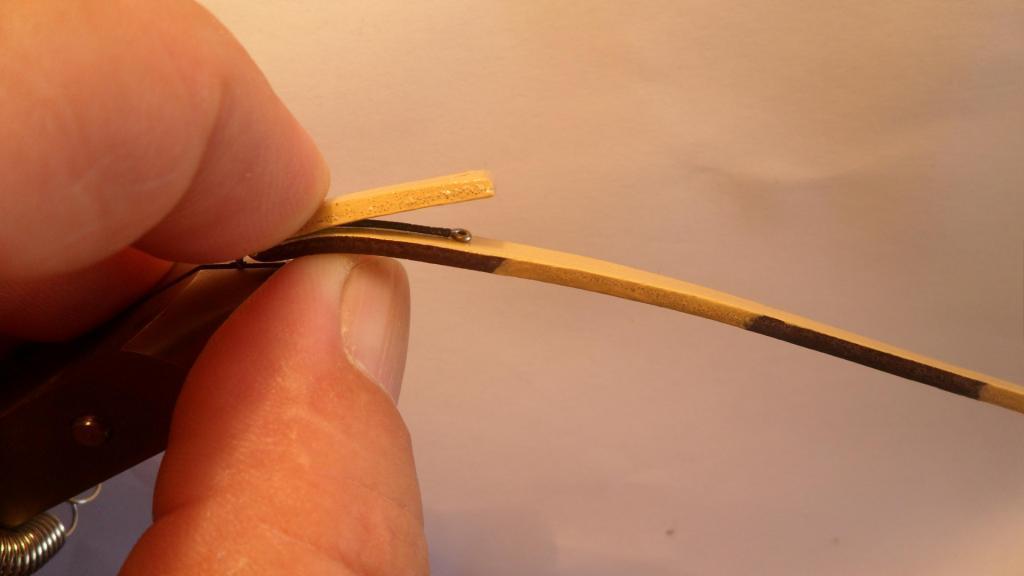
4. Fold the top and the bottom segments over the hook and cut to length exactly behind the eye of the hook
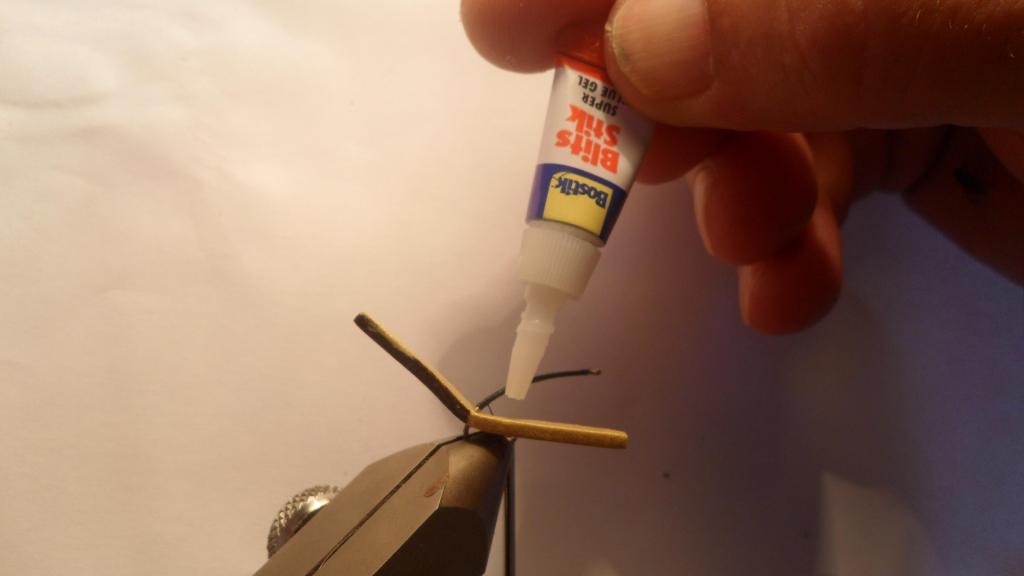
5. With a bit of Super Glue Gel glue the top and bottom segments together and hold tight for twenty seconds or so. Use as little glue as possible. Make sure that your thread lies and the bend of the foam and to the far side
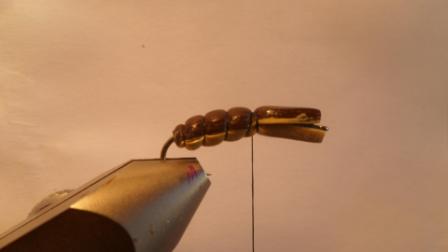
6. Now tie in segments for the abdomen for about two thirds of the hook. Pull fairly tight and tie off.
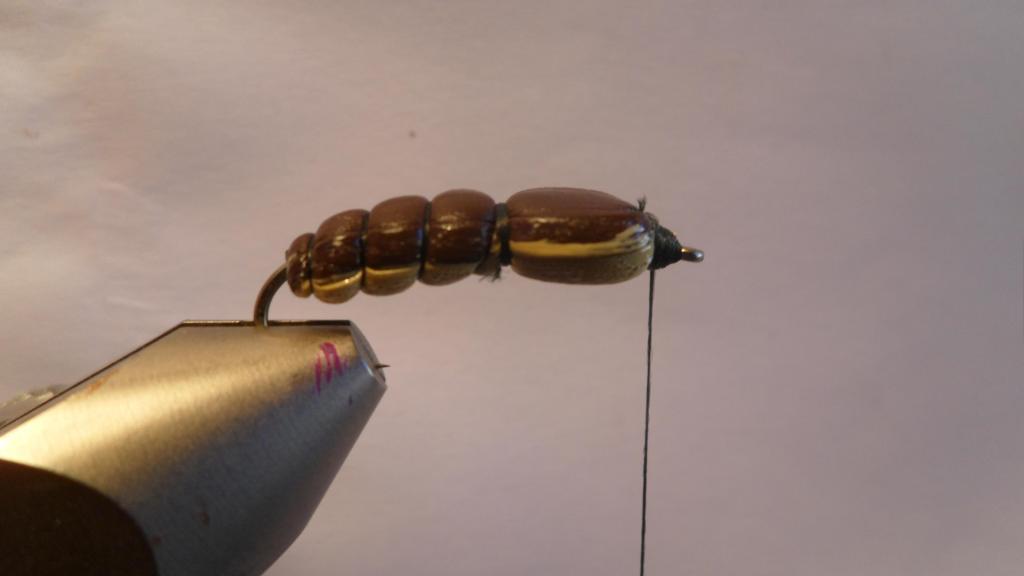
7. Start anew with your silk just behind the eye of the hook and pinch the top and bottom foam strips together to form a small head. Tie off and seal with a dab of Sally Hanson’s
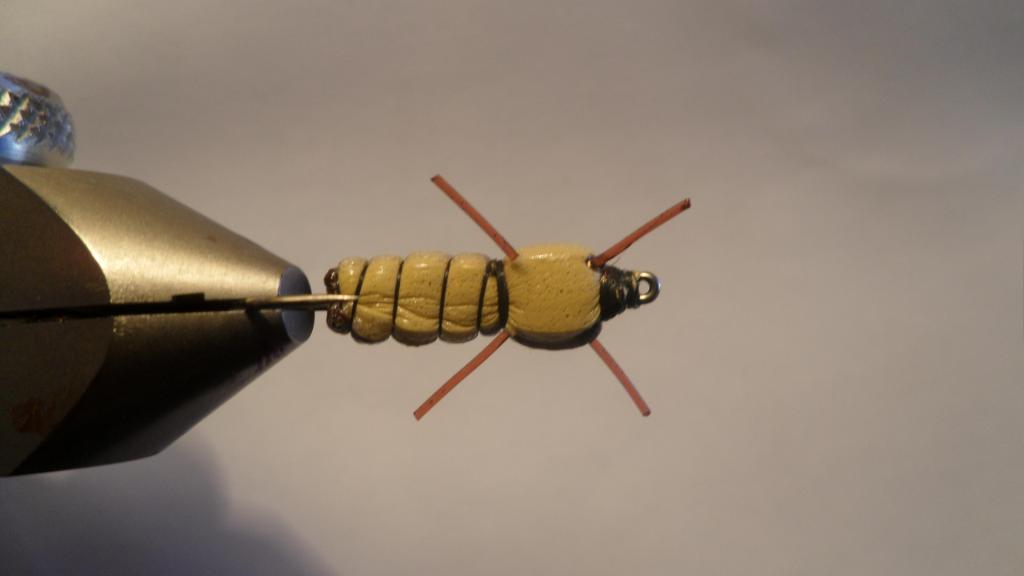
8. Stick two pair of legs through the thorax and fix with a bit of nail varnish.
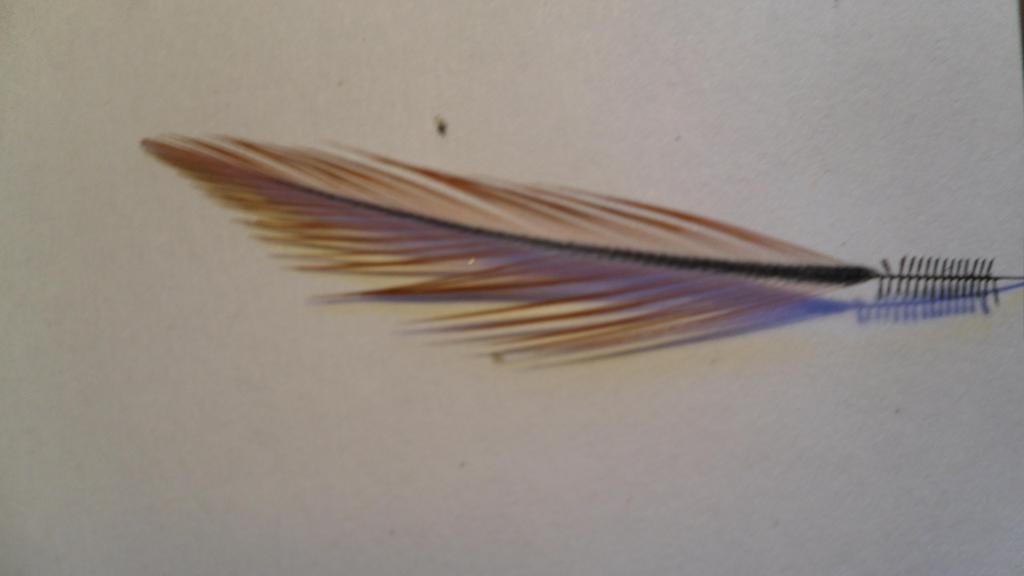
9. The wings are made from hackle tips. Strip most of the hackle but leave enough to form the wing. A few barbs are cut short to help with fixing the wing properly in the foam.
10. Stick a needle through the top part of the thorax from back to front and pull the hackle stem through after applying a little nail varnish to the short barbs

11. Do the second wing in the same way and allow some time for the nail varnish to dry.
I find that a second pair of wings makes the fly too bulky to cast.
Now wait for a termite hatch